Using the Search Panel
You can easily search your transactions based on different criteria. If you use the same searches often, you can save them and they will show on the left sidebar of the Transactions page.
In this user guide
Using the search panel
The transactions Search panel helps you to create a refined search to find particular transactions. You can define the parameters of a search based on the following criteria:
- Accounts
- Categories
- Labels
- Dates
- Merchant includes
- Merchant doesn't include
- Transaction type (expense or income, transfers or non-transfers)
- Amount
- Currency
The search options available give you the ability to track down exactly what you are looking for and to also have much greater control over the types of
Tip
If you want to hide the search panel but keep the search results open on the Transaction page, click the search icon on the top right of the panel and it will hide the panel but keep displaying your current search.

Steps to create a new search
- 1
-
Head to the
Transactions page
- 2
-
Click on the magnifying glass icon on the top-right

- 3
-
Enter your search criteria by choosing from the options in the search panel. You can include as many or few options as you'd like

- 4
- Click SEARCH


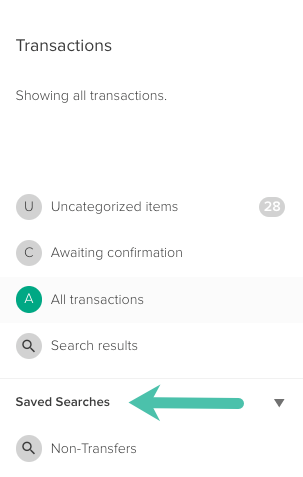
Saved searches
Once you have created a search, you're able to save it so you can easily access it again on the Transactions page or on your Timeline at a later date!
- 1
-
Run a search based on the steps in the previous section, then choose
SAVE from the bottom of the search panel

- 2
-
Give your search a name so that it's easy to find later and click
OK

- 3
-
You'll find this saved search in the left side panel of the
Transactions page and on your
Timeline (
Reports > Timeline)


Editing or renaming a saved search
- 1
- Head to Category rules, saved searches and filters ( Manage > Category Rules, Saved Searches and Filters)
- 2
- Chose Saved Searches from the left panel
- 3
-
Navigate to the saved search you want to edit, click the
three-dot menu and select
Edit or
Rename

- 4
-
If you chose
Edit, this will open the search on the
Transactions page. From here you can make changes to the search. Once you've made the desired changes, click
Update
If you chose Rename this will open a rename window, change the name and click OK - 1
- Head to Category rules, saved searches and filters ( Manage > Category Rules, Saved Searches and Filters)
- 2
- Select Saved Searches from the left panel
- 3
-
Hover over the left side of the particular saved search you'd like to reorder, and when the drag handle appears, you can then click and hold to drag and drop the item


Changing the display order of saved searches
Changing the order of your saved searches in the Edit panel, will also change the display order of the saved searches on the Transactions page and Timeline.

Deleting a saved search
- 1
- Head to Category rules, saved searches and filters ( Manage > Category Rules, Saved Searches and Filters)
- 2
- Select Saved Searches from the left panel
- 3
-
Find the saved search you want to delete, then click the three-dot menu and select Delete
- 4
-
In the window that appears, click OK